Tag Archive for: 2021 3M Half Marathon

Avoid these simple training mistakes and keep things running smoothly

Training for a half marathon is not an easy task, especially if you’ve never run the distance before. But you can do this and we’re here to help! For first-timers and veterans alike, there are 5 simple training mistakes to avoid. This will keep you on track with your runs and help you maximize your training. Life happens, we get it. Focus on what’s in your control. That mindset and avoiding these simple training mistakes will set you up for success during your next 13.1-mile race.

Running too far, too fast
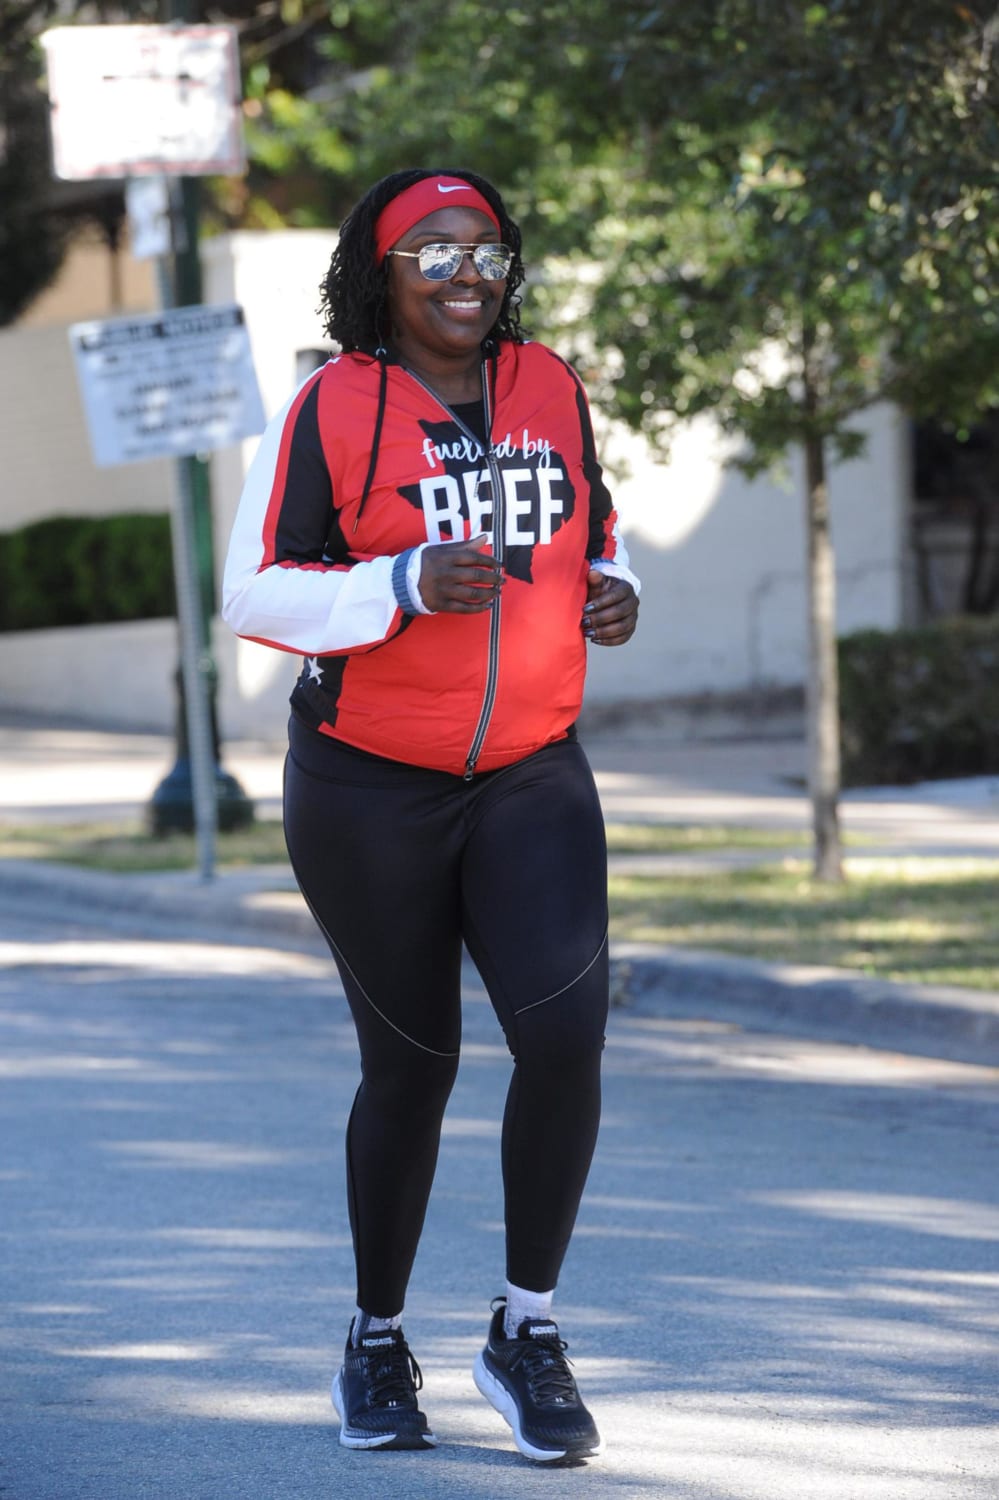
Image of female runner smiling during the 2020 3M Half Marathon. She's enjoying race day because she avoided simple training mistakes. Increasing your mileage during training too fast can put a lot of stress on your body. This can lead to injuries. For that reason, increase your training distances gradually. Start with a solid foundation of low miles and build from there. Some runners recommend the 10% rule, where mileage is increased by less than 10% each week. 

Attempting to develop speed too fast

Build speed slowly and in a consistent way. Trying to run fast intervals at the beginning of the training program is likely going to put too much pressure on your body, which is not recommended. After you’ve built a solid base with your distance you’ll get more comfortable running. Now you can start incorporating things like running the last couple of miles of your workout slightly faster. Try basic interval training or fartlek runs

Not cross-training

Obviously, running is the main and most important part of half marathon training. However, if running is your only form of exercise during training, this can result in injuries or even burnout. It’s important to mix up your training with other activities such as strength training, swimming, cycling, or yoga. This helps balance your muscle groups, build strength, and increase flexibility.

Skipping rest days

One might think that during half marathon training there is no time for rest. But there is! Increased running and exercise do not lead to an increase in preparation. Rest is just as important as running. It allows your body to repair itself and avoid overusing muscles, which can lead to injury. Make sure you follow a training plan that includes rest days. Consider taking Epsom salt baths, getting a massage, or including an extra stretch session on your days off. Pro tip: Be intentional about giving your body the rest it deserves.

Ignoring pain

It is normal for your muscles to be sore after your runs during half marathon training. However, pain is not normal. Pain that gets worse as your run progresses is an indication that something might be wrong. Usually, taking time off helps alleviate pain and prevent an injury from getting worse. However, if the pain doesn’t improve after some time off, seek professional help. Our friends at Ascension Seton Sports Performance can get you back on track!

Your training plan is meant to gradually get you to your goal. There will be bumps in the road. Every runner will tell you that. But if you avoid these simple training mistakes you’ll make your journey that much easier. Cross-train, take your rest days, and seek professional help if you become injured. Have you encountered any simple training mistakes that others should avoid? Let us know in the 3M Half Marathon Facebook Group or on Twitter!

Taking the next step: how to transition from walking to running

If you’re a casual walker looking to intensify your exercise, you should give running a try. It can burn more calories, strengthen your heart, and lower your cholesterol levels. Running can also reduce stress levels and lead to developing a healthier lifestyle. Most importantly, running nourishes your mind and soul by helping you clear your head and find peace within yourself. But how do you even begin to transition from walking to running? Our advice below will get you on the right path, the path to completing your first half marathon! This is a journey that will take time. Just remember, you’re not alone on your journey! We’re here to help you transition from walking to running. Here’s an excellent playlist for your journey!

Running gear

Your transition from walking to running may not be as difficult as you think. Make sure you have a pair of comfortable running shoes. You can extend the life of your running shoes (and save money) by only running in them. Proper fitting running shoes can also help prevent painful shin splints. Here are 7 more tips to avoid shin splints and keep your transition from walking to running on track! Wear workout gear that allows you to move freely, is lightweight, and wicks sweat. Keep a water bottle nearby to stay hydrated and replenish lost fluids. We’re fans of nuun hydration and their tablets. It’s easy to carry and help replace lost electrolytes. 

Begin your journey from walking to running

Let’s assume you walk four or five days every week and want to begin running. That’s a great start! Even if you don’t walk that much, the steps below will help you during your transition from walking to running. Pro tip: you can always take breaks in between if you are out of breath or feel exhausted.

Weeks 1-3

Develop an exercise schedule if you don’t currently have one. The goal is to become more comfortable being on your feet for extended periods of time.

  • First week – walk 30 minutes/day for four days
  • Second week – walk 40 minutes/day for four days
  • Third week – walk 50 minutes/day for four days

Weeks 4-6

Now it’s time to crank it up a bit! But don’t get too excited just yet. You want to slowly incorporate jogging into your schedule.

  • Fourth week – 10-minute warm-up walk, alternate 30-second light jog/4-minute walk for 15 minutes, 5-minute cool down walk
  • Fifth week – 10-minute warm-up walk, alternate 1-minute light jog/4-minute walk for 20 minutes, 5-minute cool down walk
  • Sixth week – 10-minute warm-up walk, alternate 2-minute light jog/3-minute walk for 25 minutes, 5-minute cool down walk

Week 7

When you feel comfortable with this routine, increase your jogging intervals and decrease your walking intervals as you see fit. Set a goal for yourself before you begin. Feel free to pick up the pace during your jog if it feels good. If you feel overwhelmed or exhausted, cut back the time.

  • Seventh week – 5-minute warm-up walk, alternate 3-minute jog/2-minute walk for 25 minutes, 5-minute cool down walk

Week 8

If you continue to feel comfortable, extend the duration of your intervals as you see fit. Alternate your jog and walking like previous routines. Continue to set small goals to reach. Feel free to pick up the pace during your jog if it feels good. If you feel overwhelmed or exhausted, cut back the time.

  • Eighth week – 5-minute warm-up walk, alternate 5-minute jog/1-minute walk for 30 minutes, 5-minute cool down walk

You did it!

By now, jogging for longer periods of time should become more and more comfortable. Congratulations, you’ve made the transition from walking to running! Continue to extend your jogging time. Maybe even quicken your stride and break into slow runs. You’ll eventually eliminate the walking portion of your intervals. When you feel comfortable running for 30-40 minutes, it’s time to sign up for your first half marathon! Do you have advice for someone who wants to graduate from walking to running? Let us know in the 3M Half Marathon Facebook Group or on Twitter.

Follow us on Pinterest and discover more ways to organize your running shoes

Sometimes our shoe collection gets out of control. This is especially true when you have specific shoes for specific activities, like wearing your running shoes only when you run. There have been a few times where we couldn’t find the pair we needed. Add in your spouse, maybe kids, or roommates and the shoe pile can grow on its own! We started thinking about ways to organize our shoes and want to share what we’ve discovered with you. We built a Pinterest board with many clever, sleek, and good-looking ideas! Read about four of our favorites below. Follow 3M Half Marathon on Pinterest and decide for yourself when you visit our “Organize Your Running Shoes” board.

Under the bed

Various plastic containers store pairs of shoes under a bed as an example of different ways to organize your running shoes. Click on the image's link to visit 3M Half Marathon's Pinterest page for more ideas.

Unless you already have drawers under your bed, chances are you have unused space. Put this location to work! We pinned several ideas for different ways to organize your running shoes under your bed. Keep your drawer on wheels so it’s easier to pull out and push back in. This is a great option if your shoes are strewn about all over the bedroom.

On the wall

5 pair of running shoes are tucked into a hand-built wooden rack that hangs from the wall. It's an example of different ways to organize your running shoes. Click on the image's link to visit 3M Half Marathon's Pinterest page for more ideas.

Use the vertical space of your walls in your garage, entrance area, or laundry room. Just like the drawer under your bed option, this is a great way to save space. It gets shoes off the ground and prevents them from becoming a tripping hazard. Building a rack or two in your garage is your best bet if your running shoes need to dry off and air out.

In your closet

Stacks of space-saving plastic containers are filled with shoes. It's an example of different ways to organize your running shoes. Click on the image's link to visit 3M Half Marathon's Pinterest page for more ideas.

Do you have a hill of shoes on your closet floor? One of our Pins provides 20 different shoe storage ideas for your closet. Organize your running shoes and get them off the ground. The hang-down design ensures that you can always find the left and right shoes when you need them. This tactic is ideal if you live in an apartment.

DIY rack

Two different DIY racks that provide examples of different ways to organize your running shoes. Click on the image's link to visit 3M Half Marathon's Pinterest page for more ideas.

This might be our favorite because there are so many different ways that the rack can be customized! Let your imagination run wild, unless you buy a rack that comes with instructions. You can build it to your desired height, move it to where you want, and customize its additional functionality. Use the top spot for plants, put key hooks on the side, or add a corkboard so you can pin photos. So many ideas! 

There are so many different ways to organize your running shoes. Our “Organize Your Running Shoes” Pinterest board has something for everyone. We know you’ll find something that fits your just as well as your running shoes! Is there a specific way you currently organize your running shoes? Let us know in the 3M Half Marathon Facebook Group or on Twitter.

You should only log running miles in your running shoes and here’s why

Picking the perfect running shoes can feel overwhelming. Once you find the ideal pair, it could be very tempting to wear them for walking as well. But are they suitable for walking? The short answer is no. It’s important to choose shoes that are made specifically for your primary activity. This means that you should wear your running shoes only when you’re out for a run. Their typical lifespan ranges between 300-500 miles. This advice applies to all runners, especially if you’re training for your first half marathon!

One of the things many people like about running is that it requires minimal equipment. Nevertheless, what you put on your feet is a critical piece of the puzzle. Whatever the cost, you want to extend their life for as long as possible. Here are some reasons why your running shoes should only be worn for running.

Prevent injury

Using running shoes for other activities, especially other sports, may result in an injury like shin splints. Choose the type of shoe that is specifically designed for the sport you are interested in. Keep running shoes just for running. This is true whether you are a beginner or you’re into marathon training. You want your pair to be accustomed to running only. Introducing other activities can make the shoe breakdown faster than desired. Pro tip: further prevent injury when you avoid these 5 training mistakes.

Less cushioning

Running shoes generally have less overall cushioning than walking shoes, especially in the heel. Even though running is a higher impact activity than walking, “your foot is on the ground longer when you walk so the cushion helps to offset that impact over time,” said Emily Splichal, MD, author of “Everyday Is Your Runway: A Shoe Lover’s Guide to Healthy Feet & Legs.” Less cushioning means it could wear out faster if used for more than just running.

Develop wear patterns

Your gait cycle and pronation type lead to the development of wear patterns on the bottom of your shoes. Because walking is biomechanically different from running, each activity will develop different wear patterns. For this reason, if you are wearing the same pair for both walking and running, this may result in multiple wear patterns that can aggravate gait problems. Pro tip: focusing on your stride, cadence, and body composition with these 7 tips can help with wear patterns too.

Save money

A quality pair of new running shoes can be expensive. If you’re committed to logging hundreds of miles you may need a new pair every couple months. Add the daily wear and tear for anything else and you’ll discover that you need to replace them more frequently. To avoid that, you should use a separate, less expensive pair of sneakers for everyday wear.

In conclusion, you should wear your running shoes only for running. Yes, even if they’re really comfortable and you feel fine when you walk in them. By doing this, you will protect what you have spent so much time looking for. You’ll extend their life and reduce the amount of money you spend.

Prevent shin splints and keep your training momentum going strong

Are you a beginner runner? Then, you might’ve heard about “shin splints.” But beginner runners aren’t alone in experiencing shin splints. Veteran runners get them too. However, all runners can agree they’d rather avoid them! Shin splints describe the pain in your shin that occurs from overuse. The shinbone is the large front bone that you can find in your lower leg. Shin splints arise when bone tissues, tendons, and muscles overwork. The good news is there are ways to cure and prevent it. Prevent shin splints with our 8 tips and keep your half marathon training on track. Pro tip: click on the image, download the PDF, and post it where it’ll remind you about these tips!

1. Stretch your calves

Image of an infographic breaking down 8 ways to cure and prevent pain from shin splints. 1. Stretch your calves before and after every run. 2. Focus on your form. Try landing in the middle of your foot on longs runs. 3. Include strength training. 4. Get the right shoes. Running in running shoes does make a difference! 5. Cross-train. Working muscles differently can strengthen them. 6. Rest. Give your body the opportunity to repair itself. 7 Train on softer surfaces like a treadmill or your local trail. 8. Gradually increase your mileage. Build your body up overtime to the desired mileage.Do you feel mild shin pain? If you are running, stop and do a quick calf stretch. This should relieve your pain. To prevent shin splints, you should make it a practice to stretch your calves after every workout session. Regularly doing this will help prevent injury to your calves as well. Pro tip: with your right foot, place your toes on top of a curb and your heel at the bottom. Lean forward or try to grab your toes. Do this for 10 seconds, then switch to your left.

2. Focus on form

One method you can try to prevent shin splints is to change your foot strike. Try avoiding toe running and heel striking on your long runs. On your next run, try to land in the middle of your foot. When you land on your heel, it can stress your heels. In the same way, when you land on your toes, calf muscles are impacted. Both of these methods can contribute to shin splints and other injuries. Pro tip: learn how your stride and cadence can impact your form.

3. Include strength training

If you get shin pain during half marathon training, it could be linked to weak anterior tibialis muscles. These muscles are located on the front side of your lower leg. They make your foot flexible at your ankle. Did you increase your distance too fast? This could be a cause of your pain. You increase the likelihood of injury if your body doesn’t possess the strength needed to run long distances. 

4. Get the right shoes

For some runners, shin splints can arise due to running in the wrong shoes. Make sure you choose shoes that are specific for runners and fit your running stride. Don’t run in shoes that are old or have more than 300 miles on them. You want your shoes to be snug, not too loose or too tight. Schedule an appointment with our friends at Fleet Feet Austin and get fitted for the right shoes!

5. Cross-train

Take a break from running and cross-train. These workouts will give your body a break from the strain of running and the impact on your shins. When you run, your body uses muscles in a specific, repetitive manner. Cross-training works those muscles differently and can strengthen them. Examples of workouts you can do include aqua jogging, cycling, yoga, and swimming. Learn more about cross-training and how it helps you avoid these 5 training mistakes. Pro tip: while you aren’t logging miles, you’re still working towards your ultimate goal!

6. Rest

Rest is absolutely vital. It provides your body with the opportunity to repair itself. If your training plan calls for a rest day, take it. Use your foam roller for 15-20 minutes if you get the itch to go for a run. If you’ve just started running, exercise once or twice a week. Increase the amount of exercise as you become more comfortable with the workouts or the distance you’re running. Give your body the rest it needs!

7. Train on softer surfaces

Some beginner runners get shin splints because they run on harder surfaces. Running on the roads isn’t the only way to accrue miles. Try running on softer surfaces. If you have access to a treadmill, try alternating your runs between the treadmill and the road. Are there trails near you? Get out on the trails! You’ll avoid the unforgiving concrete and all the traffic. Plus, trail running forces you to slow down, naturally causing you to change where your foot strikes. This breaks up the repetitive motions from road running. Pro tip: due to the constantly changing terrain, trail running can strengthen your lower body.

8. Gradually increase your mileage

Shin splints while training is common, especially if you have recently intensified your training routine. If you are a beginner, you should gradually increase your mileage during your training. Runners returning from injury should slowly increase their mileage. Increasing your mileage gradually is another way to strengthen your body over time and prepare it for the distance you want to run.

Nobody wants to experience shin splints, especially runners. It can derail your training and set your timeline back. The best approach is a proactive one. Properly utilize our 8 tips to prevent pain from shin splints and keep your training on track. Do you have a way to avoid shin splints? Let us know in the 3M Half Marathon Facebook Group or on Twitter.